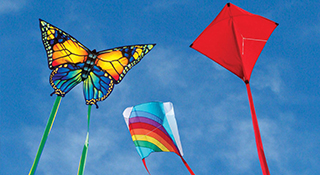
Stunt Kite 101 : Launching and Flying
 First Time Launching is Easier with a Helper
While you hold the handles with the lines taut, have your helper stand downwind from you, behind the kite, holding it with the nose up. As you pull lightly on the lines, your helper should give your kite a gentle underhand toss. Immediately after launching your kite, your helper should step backwards to avoid being hit if your kite dives.
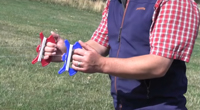
Self-Launching
Kites with standoffs can be laid on their back and self-launched. Pick the handles up carefully, pull gently to stand your kite upright. Then pull back quickly to launch it. In light winds, take a few steps backwards to help your kite gain altitude. In strong winds, you may need to stake your handles down and lean your kite back against the line tension to keep it from launching itself (See our self-launch illustration, below).
 On Your First Flight
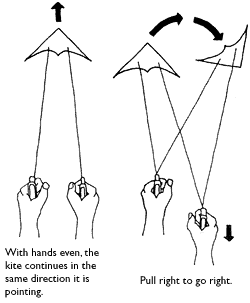
After launching, keep your hands together in front of you. Let your kite fly up to gain altitude. If your kite goes to one side, pull slightly on the opposite handle to correct its flight. Get your kite to fly high and downwind from you, where it will be easiest to control. When it's flying high and steady, pull on one line and see how your kite responds. Pull right to go right and left to go left, returning each time to the center. Remember to keep your kite high, start slowly and don't pull too far. Move your hands inches, not feet. Keep pulling and your kite will loop. Stop pulling and it will continue straight in the direction it's pointing. Don't worry if the lines twist around each other when you do loops. You'll feel some resistance, but several wraps on the lines won't affect your control. If you're having trouble controlling your kite, try adding a tail or flying in a different (lighter) wind.

Explore the Wind
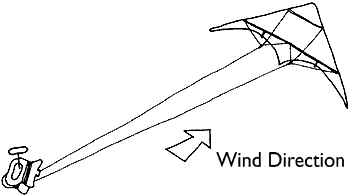
Once you know how your kite behaves, you can explore its Wind Window (below). Down low in front of you is the "power zone" where your kite pulls hard and speeds up. Smaller hand movements are needed to control it here. Off to the sides are the "edges" of the window, where it slows down and the most skill is required to fly. Right and left hand turns take unsymmetrical amounts of pull here. As you fly, notice how the wind affects your kite. In strong winds, it speeds up and pulls harder. You can use this to control your kite. Step backwards a few steps to increase its speed (effectively increasing the wind) or forwards to slow it down.
Landing is Easy
To land your kite gently, fly it low and far to the side until it loses lift and comes down. With some practice, you can land it nose up and ready to relaunch. Fly it to the side and as it comes near the edge turn the nose up and step forward to land it.
Developing Your Technique
You can make your kite turn by pulling on one handle, by pushing forward with the other handle or by doing both at once. Notice that the further and quicker you pull or push, the quicker the turn. You'll also find out how far not to pull on a turn. Too far and your kite may "stall" (spill the wind) and fall out of the sky. Use push turns in light winds to prevent stalling. For best results, keep your hands down low near your body and make smooth, controlled motions. Jerky and excessive movements will make your stunter fly in a wild and erratic manner.
Winding in Stunt Kite Lines
Land your kite. If you're using handles, put them together and wind the lines around both at once (very few line twists will be added). If you're using a card winder, figure eight the lines onto the winder so you'll have twist-free lines the next time you fly.
Previous : At the flying field | Next : Adjusting Bridles